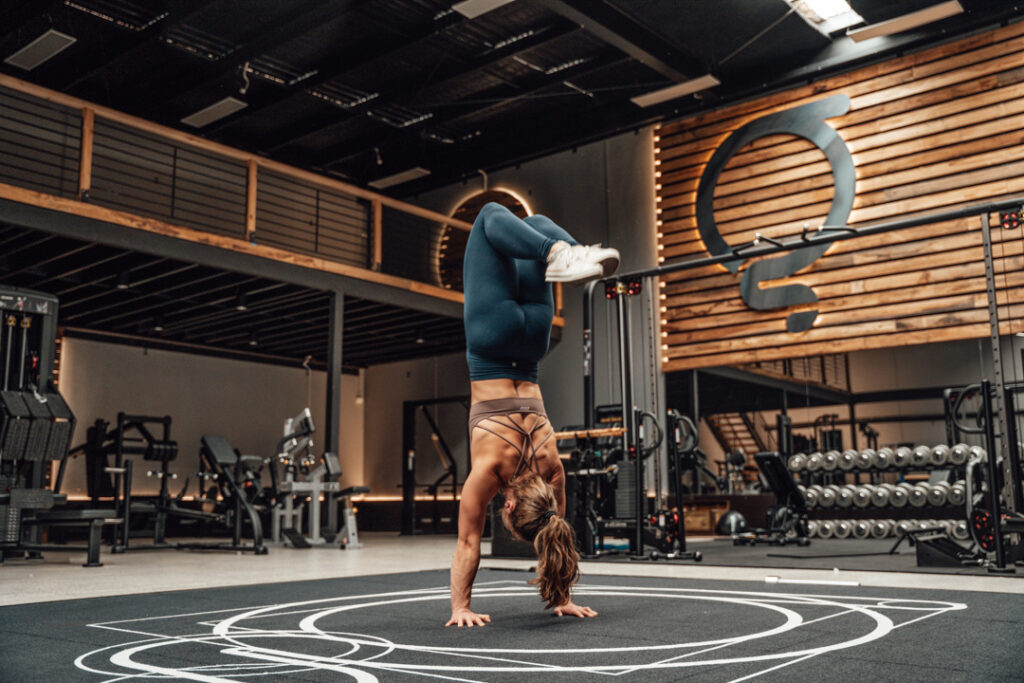
Bands are a great teaching tool because they really force the issue with stability. Unlike a wall or a box where you can leave your weight in it and somewhat cheat your way through a float, flutter or shift drill, the band will make your life really unpleasant if you lean into it and move around. This is great – it means you have to work to be present in your hands and only use the band if you start to lose balance.
For all of these exercises, you’ll need to place 1-2 heavy resistance bands in a squat rack in the j-hooks, high enough in the rack to catch your feet when you kick or climb up.
Exercise Quick Navigation
Handstand Flutter from Rack
What is it?
The hardest of the flutter drills, because the band will prevent you from resting into it.
Technique
Kick up to the band in the rack the same way you would to the wall. The band will flex as you arrive in it. If you’re too close, it will spit you back out the way you came, so make sure you are 1-2 hand distances away from the rack. Split your legs apart and shift your body weight over your hands until the band stops wobbling. Slowly switch the legs, keeping almost all your weight in your hands (you will have to balance!) and being as light in the legs as possible.
Common Mistakes
Leaving weight in the band and wobbling, or collapsing and relaxing into the shoulders and spine.
Handstand Flutter from Rack – Facing the Rack
Technique
Exactly as the one before, but facing toward the band. Climb into it by placing one foot on the upright of the squat rack then hooking the other foot into the rack.
Band in High Rack to Handstand Hold
What is it?
This is a bounce drill, so you’ll have to control the momentum as the band throws you forward.
Technique
Find your way into a handstand facing toward the band. Allow a small bounce into and out of the rack to take you into a handstand hold. Grip the ground to prevent overbalancing and try to hold the handstand briefly.
Handstand Bounce to Walk
What is it?
A more aggressive drill where you use the bounce of the band to create a challenge to control.
Technique
Kick slightly off the band, then allow the bounce to force you into an overbalance as you rebound. Step into your handstand walk from there.
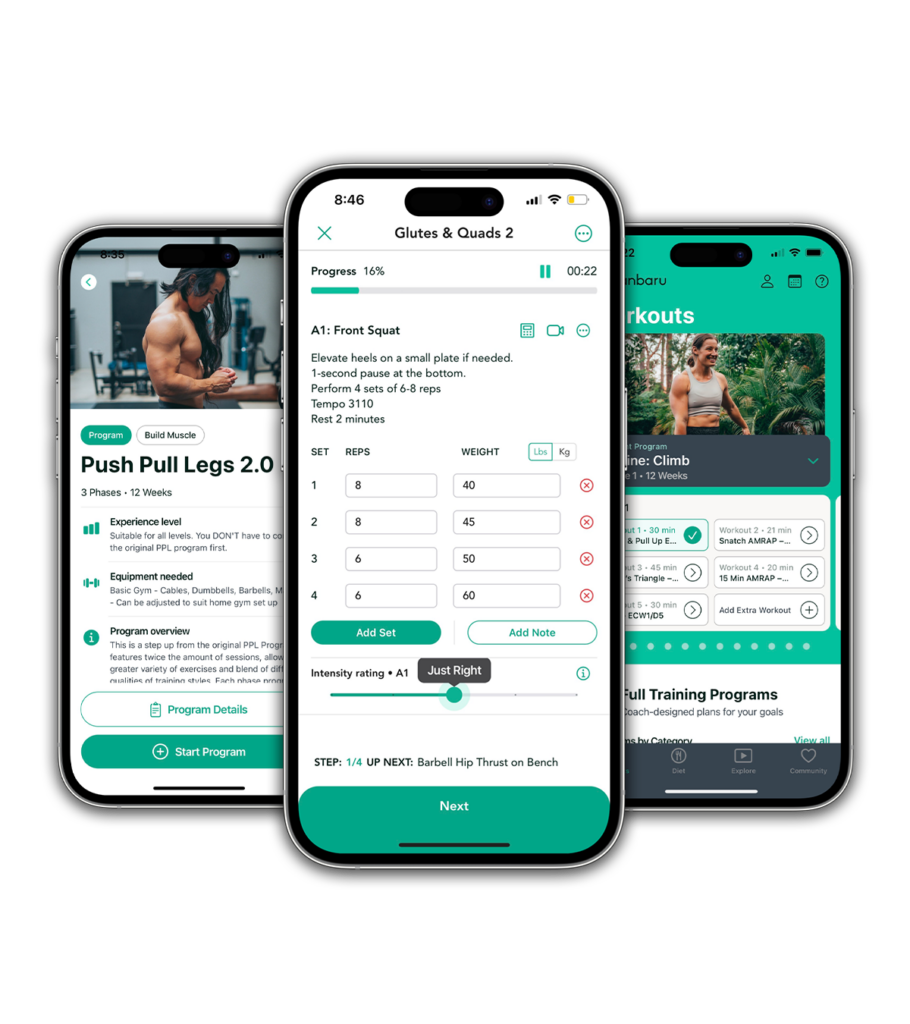
Ready to workout?
Follow proven programs written by expert coaches, delivered in an easy-to-use app built by lifters, for lifters.
Building muscle and getting stronger isn’t rocket science. You train hard, eat well, and rest sufficiently, and you’ll see changes. But there are ways to make it more efficient. In…
There is a simple equation to building muscle. Adequately intense weight training + eating enough for growth + getting sufficient sleep = muscle growth! But it’s normal to face roadblocks….
No, we promise it’s not click bait. We know the world of social media, particularly in the fitness industry, loves quick fixes — but that isn’t always possible. In this…
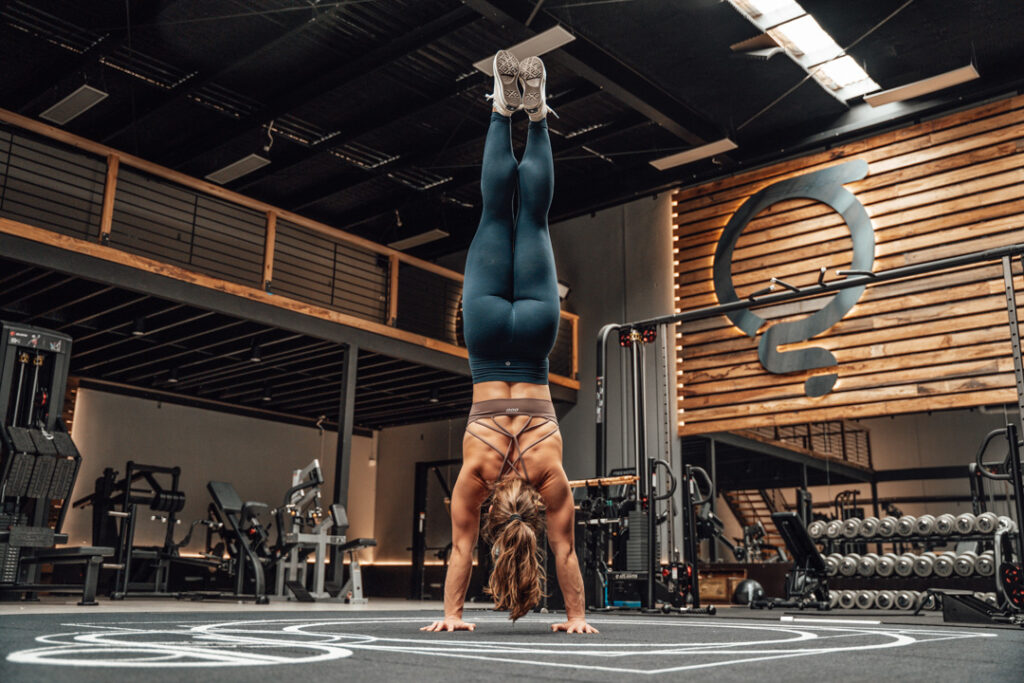
Are you “kind of” handstand walking but struggling to get the mechanics right? See if these drills help you click with the movement.
What we’re trying to promote with these is a strong push into the floor to open up the shoulder angle, get strong at taking one step on your hands at a time on your hands, and maintain enough of a strong line through the torso to propel your body forward.
Exercise Quick Navigation
Wall Walk
What You’ll Need
A wall.
Technique
Starting with your feet on the wall and your chest on the floor, push up into a high plank then shift your hips back to a pike. Step both feet up on the wall, then start walking your hands in toward the wall until your chest lightly taps the wall in a wall-facing handstand.
Make sure you pull your bottom ribs toward your belt line and stay in a long tight line so you’re not wobbling side to side much as you walk toward the wall.
Common Mistakes
Being loose in the core – this only costs you energy in the shoulders! Make your life easier by keeping a hollow body as best as you can.
Wax on Wax Off
What is it?
Practicing an efficient hand movement for your handstand walks.
What You’ll Need
A wall.
Technique
In a handstand on the wall (facing away from the wall), push even harder into the floor to make space to sweep the other hand around in a small circle (like you’re waxing a car, but elbows straight). This mimics how we want to step in a handstand walk.
Common Mistakes
Bending the elbows too much – in an efficient handstand walk, the elbows bend only slightly.
Lateral handstand walk
What is it?
Practicing the shift from one hand to the other and moving your body with it.
What You’ll Need
A wall.
Technique
In either a chest to wall or normal kick up to handstand position, take steps sideways by moving one hand then the other. Your weight will shift into the grounded hand. You can spice it up by walking over a plate as well if you want more challenge!
Kick Up Step to Wall
What is it?
Practice taking steps in open space then returning safely to the wall.
Technique
Kick up to a freestanding handstand then take a few steps toward the wall. The more confident you are, the further away you can start.
Handstand Step from Wall
What is it?
Taking your first steps in a handstand walk, without having to worry about the accuracy of your kick up.
What You’ll Need
A wall and space away from the wall to walk into.
Technique
Wall walk your way into a chest to wall handstand, shift your weight over the top of the fingertips and start stepping your hands to walk away from the wall.
Common Mistakes
Kicking off the wall instead of shifting into the overbalance, or shifting way too fast and not being able to control the overbalance to turn it into an efficient walk.
Handstand Walk Parallel to Wall
What is it?
Walking on your hands with the assistance of one foot dragging along the wall to prevent serious over- or under-balances.
What You’ll Need
A wall with 3-10m of space that you can walk along without running into any hazards.
Technique
Kick up to handstand then let the foot nearest the wall catch the wall.
Common Mistakes
Leaving the foot behind – you’ll need the foot on the wall to be slightly ahead of where your hands are for this to work well.
Ready to workout?
Follow proven programs written by expert coaches, delivered in an easy-to-use app built by lifters, for lifters.
Building muscle and getting stronger isn’t rocket science. You train hard, eat well, and rest sufficiently, and you’ll see changes. But there are ways to make it more efficient. In…
There is a simple equation to building muscle. Adequately intense weight training + eating enough for growth + getting sufficient sleep = muscle growth! But it’s normal to face roadblocks….
No, we promise it’s not click bait. We know the world of social media, particularly in the fitness industry, loves quick fixes — but that isn’t always possible. In this…
Float to handstand drills are some of the most important for your progression in handstand holds, and therefore also handstand walks. Floats teach us to slowly and gently shift into the balance point in a handstand. They are a gentle movement and require you to engage the hands as you float off a box, wall, band or other object into your handstand hold or walk.
This is where most people go wrong – they are in a hurry to be in a handstand, so they rush the shift in position from the moment their weight is on another surface to the moment they are fully supporting their own weight in a handstand. Kicking, shoving, or otherwise using momentum to get off a secondary base of support fails to build the understanding of where the body weight needs to be centred in the hand for a successful handstand.
As you watch through the float drills below, think about how you could slow it down, be gentle, and let your brain focus on what your hands and body weight are doing, instead of thinking about being “off” or “on” the secondary base of support.
Exercise Quick Navigation
Box float to handstand
What is it?
A float to handstand drill that leaves more weight on the box and requires a more substantial and obvious weight shift than when you float from a wall.
What You’ll Need
A 20″ x 24″ x 30″ box, and maybe some extra bumper plates if you need a higher box.
Technique
From a pike on the box (you can bend your legs if you need to), lift one leg up toward the sky and feel the weight shift into your hands from your feet. Keep shifting until the leg remaining on the box gets so light that it feels like less than a gram of your body weight is left in the box. Grip your fingers into the floor and allow the foot to lift off the box.
Common Mistakes
Pushing or kicking off the box. No float drills involve kicking.
Band in rack float to handstand
What You’ll Need
A couple of thick resistance bands, a squat rack or rig with uprights that you can set the resistance bands in at roughly the height of your neck or chin.
Technique
Climb your legs up the squat rack so that you can hook your feet into the band. Stretch your legs up so that you can now rest your shins into the band. If the band is on your thighs, raise the band up higher. Get into a tall handstand position and separate your legs. Bring the leading leg over your body until you feel the weight of the leg still in the band start to feel light. Continue shifting until there is hardly any weight remaining in the band and the band is no longer wobbling. See if you can lift the leg off the band. If you can’t lift it off, you need to keep shifting further forward into your hands.
Common Mistakes
Leaving way too much body weight in the band and trying to kick out of it.
Float to handstand from wall
What is it?
The smallest movement out of all the float to handstand drills. This makes it both the easiest because it doesn’t take much shift to get into the float, and also the hardest because you have to be more conscious of a less obvious shift in weight from the heels of the hands to the middle of the hands.
What You’ll Need
A wall.
Technique
From a wall-facing handstand, separate your legs and allow the leading leg to gently pull you off the wall. Move as slowly as you can. At some point, you will feel almost no weight left on the wall in the second leg, and your second foot will leave the wall when your weight has fully shifted into your hands. Do not rush the legs together at this point, just hold that position by gripping the ground.
Common Mistakes
Pushing or kicking off the wall, or rushing to close the legs.
Another mistake is not gripping the ground or pushing the fingers into the floor, so when the weight shifts there’s nowhere to go but to fall over the top.
Box straddle press
What is it?
A double-leg float (which is how we regress the press to handstand!)
What You’ll Need
A box.
Technique
From a pike on the box, shift your legs wide then aggressively (but slowly) shift your weight over your hands until your feet lift off the box. You will need to push harder into the floor with your legs than with the single leg variations of this.
Ready to workout?
Follow proven programs written by expert coaches, delivered in an easy-to-use app built by lifters, for lifters.
Building muscle and getting stronger isn’t rocket science. You train hard, eat well, and rest sufficiently, and you’ll see changes. But there are ways to make it more efficient. In…
There is a simple equation to building muscle. Adequately intense weight training + eating enough for growth + getting sufficient sleep = muscle growth! But it’s normal to face roadblocks….
No, we promise it’s not click bait. We know the world of social media, particularly in the fitness industry, loves quick fixes — but that isn’t always possible. In this…
Fear is a normal part of learning to handstand (or any gymnastics) and we don’t have to just ignore it! Using drills to stretch your comfort zone helps you learn to become comfortable with new movements and stay safe doing so.
Learning to bail from a handstand is particularly important, and it all starts with remembering a movement you probably did at school: the cartwheel! The cartwheel helps us understand how to fall from a handstand because you shift onto one hand and rotate around that planted hand. This is the same movement we do when we overbalance from a handstand.
We can learn cartwheels to intentionally mimic overbalanced positions and learn to manage them, while still progressing them slowly enough that you feel safe.
Exercise Quick Navigation
Cartwheel
Technique
The important part of a cartwheel is the sequencing – one limb at a time lands on the floor. We don’t want both feet landing on the floor at once. It’s okay if your cartwheel is small at first, but as you gain confidence try to make it bigger and bigger until your feet pass directly over your head and you are perfectly vertical upside down.
Common Mistakes
Beginners will be tempted to go around the side of a cartwheel instead of over the top. The more you can get yourself to go fully upside down, the more helpful it will be when you bail from a handstand.
Cartwheel off box
What is it?
When you’re competent with a cartwheel, or if you need to try a different version, you can start the cartwheel with your feet on a box. This will help force your weight further over the top, so make sure you’re not just hopping off to the side of the box.
What You’ll Need
A 20″ x 24″ x 30″ box.
Technique
Walk your hands in so your hips are over your hands in a pike, then shift your weight over your hands so far that you have to lift one hand with the other still planted, then twist to catch yourself with one foot at a time.
Common Mistakes
Landing both feet at once, or falling sideways next to the box instead of rotating over one planted hand.
Cartwheel off wall
What is it?
Much like the box, the wall leaves you with almost no escape from the shift required to go over the top. Get adventurous and force yourself to shift close to the wall so you can really feel what it’s like to overbalance over the top of your hands.
What You’ll Need
A wall!
Technique
Wall walk your way to a wall-facing handstand, then shift your weight forward in your hands until you start to fall over the top. Shift one hand out of the way, rotate in that direction, and catch one foot on the floor at once.
Common Mistakes
Not shifting far enough over the top of the hands.
Overbalance from wall
What is it?
This is much like the cartwheel from wall, but you’re going to generate some momentum pushing off the wall so that you have to catch in your cartwheel quickly.
What You’ll Need
A wall.
Technique
Wall walk your way to a wall-facing handstand, then use your foot to push off the wall into an overbalance. Shift one hand out of the way, rotate in that direction, and catch one foot on the floor at once.
Single arm cartwheel
What is it?
A more advanced cartwheel that can help you understand how to rotate over one hand a bit faster than the two-handed cartwheel.
Technique
Enter the cartwheel as usual, but do not place the second hand on the ground. Twist over the top, landing your feet in the same order as usual.
Common Mistakes
The one handed cartwheel is very hard unless you can do a good cartwheel with a full rotation over the top. Make sure your cartwheel is good before you try this!
Ready to workout?
Follow proven programs written by expert coaches, delivered in an easy-to-use app built by lifters, for lifters.
Building muscle and getting stronger isn’t rocket science. You train hard, eat well, and rest sufficiently, and you’ll see changes. But there are ways to make it more efficient. In…
There is a simple equation to building muscle. Adequately intense weight training + eating enough for growth + getting sufficient sleep = muscle growth! But it’s normal to face roadblocks….
No, we promise it’s not click bait. We know the world of social media, particularly in the fitness industry, loves quick fixes — but that isn’t always possible. In this…