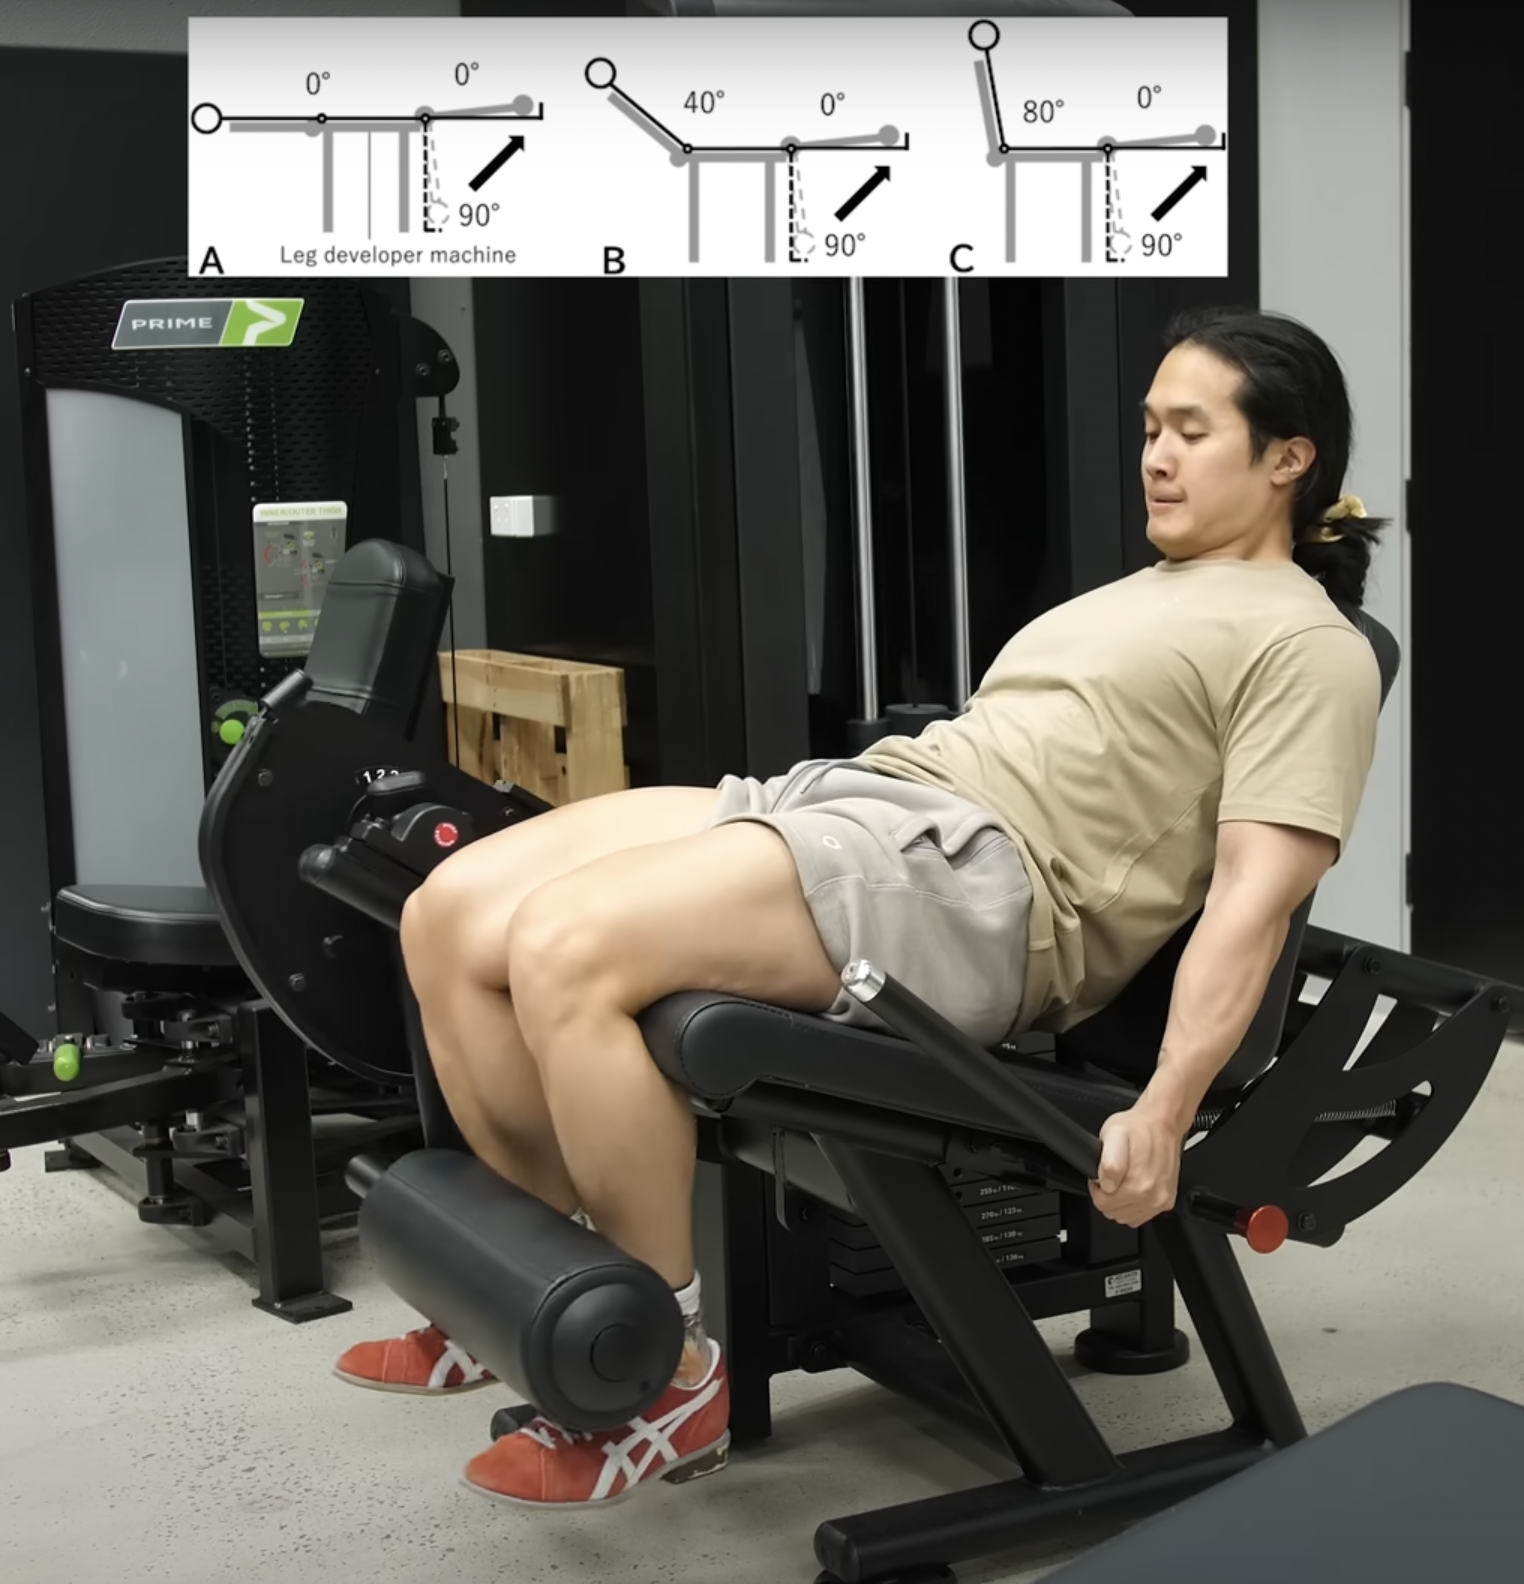
Even though a kipping bar muscle up is driven primarily by momentum and good mechanics, it still requires a good strength base to do them well and safely. These basic bent-arm pushing and pulling drills will help lay the foundation for the strength you need to kip to the top of the bar.
Support hold variations
We have 5 variations of support holds in our kipping bar muscle up program:
- Low bar support hold
- Support hold (high bar)
- Jump to support
- BMU jump to support
- Ring support
What do they do?
Help you understand and build strength in the finishing position of a bar muscle up – there needs to be constant downward pressure on the bar. You also need to keep your neck long and make sure your shoulders are as far away from your ears as you can make them by pushing your shoulders down. This will engage muscles that will help you stay stable on top of the bar.
Technique
For all variations, follow along with the videos – but the themes will always be the same:
- Long neck/shoulders down
- Active pressure into the bar
- Tight body line with legs together and hollow body position
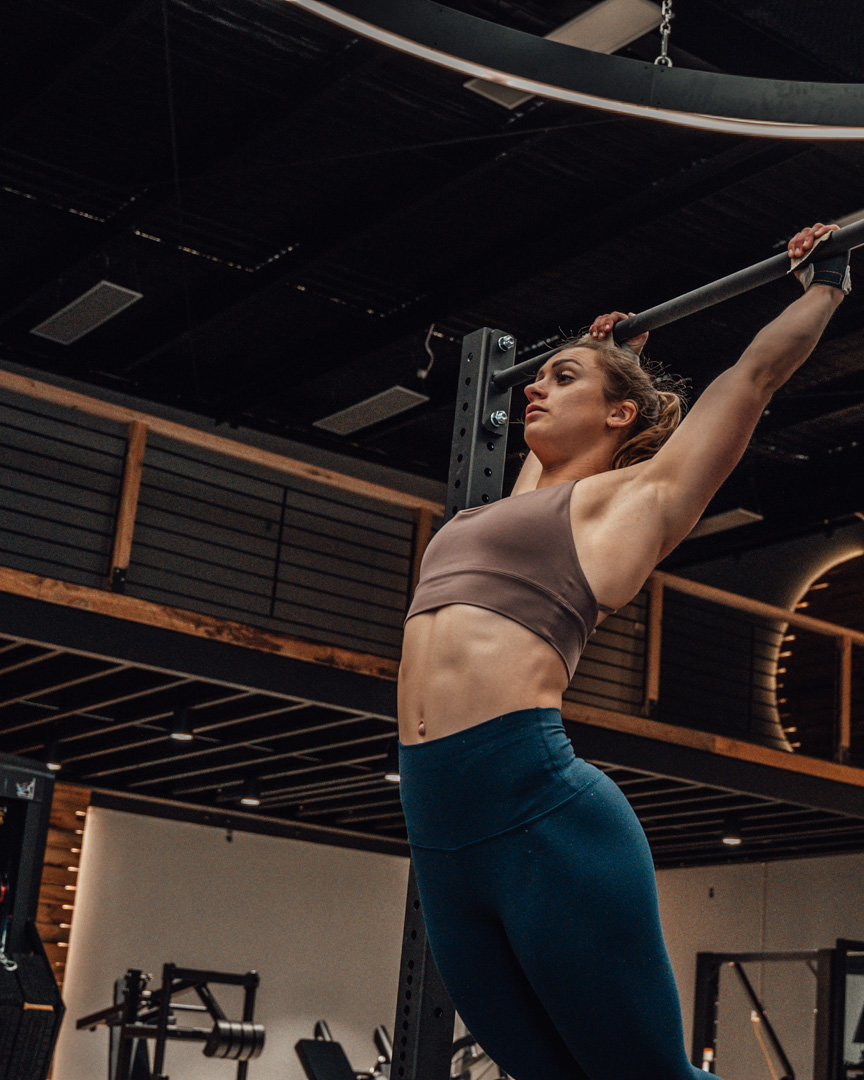
Straight arm pulling strength drills
Straight arm pull – toes to box
What You’ll Need
Set up a box just in front of the bar you’re working on. You should be able to stand with your heels directly below the bar and your toes are just touching the box.
Technique
Hop up to the bar, and place your toes on the box. Keeping your body tight so that your butt doesn’t shoot back, press down onto the bar with your arms straight. Do not let the elbows bend. You should pull backward such that your shoulders move behind the bar and your toes slide up the box.
Do not let your butt shoot back further than your shoulders. If you catch yourself doing that, try squeezing your glutes to stop it from happening.
Banded lever pulls
Technique
Set a thick band up on a bar and climb into it with both feet in the band. Keeping a perfectly straight line from your shoulders to your toes, push down into the bar with your elbows locked as hard as you can. Your shoulders should drift behind the bar and the band will pull your feet up until you’re in a somewhat lever-like position.
Common Mistakes
Losing the hollow body position by extending the back excessively.
L-sit on dumbbells and L-sit on rings
A good L-sit is a classic gymnastics foundational move because it challenges the triceps (helpful for a straight arm pull) and the abs (helpful for keeping a hollow body while moving through space).
Technique
With your hands next to your hips, squeeze the dumbbells or rings back so that your hip joint aligns with your wrist. You don’t want your hands next to your thighs – that means you’re not squeezing back hard enough.
Lock out the legs (if doing a full L-sit) or tuck the knees in close to your chest. The legs should be at least as high as the hips if not slightly higher. Press down into the rings or dumbbells so your shoulders are far away from your ears with a long neck.
If you’re on the rings, maintain constant pressure down, but try not to just hug the rings to your sides.
Common Mistakes
- Using a progression that is too hard for you right now – there’s no shame in a tucked L-sit and you’ll get more out of doing a regressed version well than doing a hard version poorly.
- Allowing the legs to drop down
- Allowing the hips to drift behind the hands
- On the rings, squeezing the rings to your sides so you don’t have to stabilise
Ready to workout?
Follow proven programs written by expert coaches, delivered in an easy-to-use app built by lifters, for lifters.