Making the right shapes is the FIRST step in getting your toes to bar to work for you, and eventually do them efficiently in a workout setting.
Exercise Quick Navigation
Arch Lifts
Technique
Lying flat on the floor, squeeze your glutes and lift your arms off the floor. Keep your heels together as you do so. Your legs and arms should leave the ground.
Do not shove your belly into the ground and hyperextend the low back. This is not part of the arch position and it’s not a good habit to get into.
A nice arch is long and distributed, with tight lines and no one point in your back doing all the work.
Kip Swing variations
The kip swing itself can be tricky and a good kip swing sets up good habits for the future. Hugely bent knees do not contribute much power when moving from arch to hollow, and a longer body line is more helpful.
To combat common bad habits like a loss of tension and a large knee bend, we can use targeted positioning of resistance bands to make sure you are keeping your shapes all the way through the kip swing.
Beat swing to band (heels)
Beat swing to band (hollow)
Beat swing to band (chest)
Beat swing to bands (both sides)
Beat swing
Kip swing
How do I use these?
Try them all. Figure out which ones you find the hardest, and spend time on those. Remember that the things that make this hard are losing tension and length, or starting with a kip that’s bigger than you can currently control. Be okay with a smaller movement to start while you build confidence and ability here.
Technique
Set the band up according to the video. Start in a dead hang, and do a small beat swing. The band will throw you out of position, so you will have to fight back with extra tension and intention to make sure it doesn’t cause you to lose rhythm.
Hollow Rocks
Technique
From a hollow body hold, rock back and forth. Ensure that your whole spine rolls across the floor, you shouldn’t be going thud-thud between your shoulders and your hips because there should be a nice curved spine to roll across.
Entry Jump Sequence
We have 3 variations of this in our kipping bar muscle up program:
Entry jump (banana jump)
Entry jump to arch
Entry jump to kip swing
What is it?
Watch the videos to understand the key components of the entry jump for a toes to bar:
Fairly close behind the bar – no need to create lots of extra momentum here.
Jump into a small pike position so your toes lift as you catch the bar (your body should not be in a straight line when you catch the bar
Swing into a long, tight arch, so that your toes are behind the bar when your shoulders are in front of the bar
Practice good entry jumps – they will save you a lot of pain when doing higher rep sets in the future!
Ready to workout?
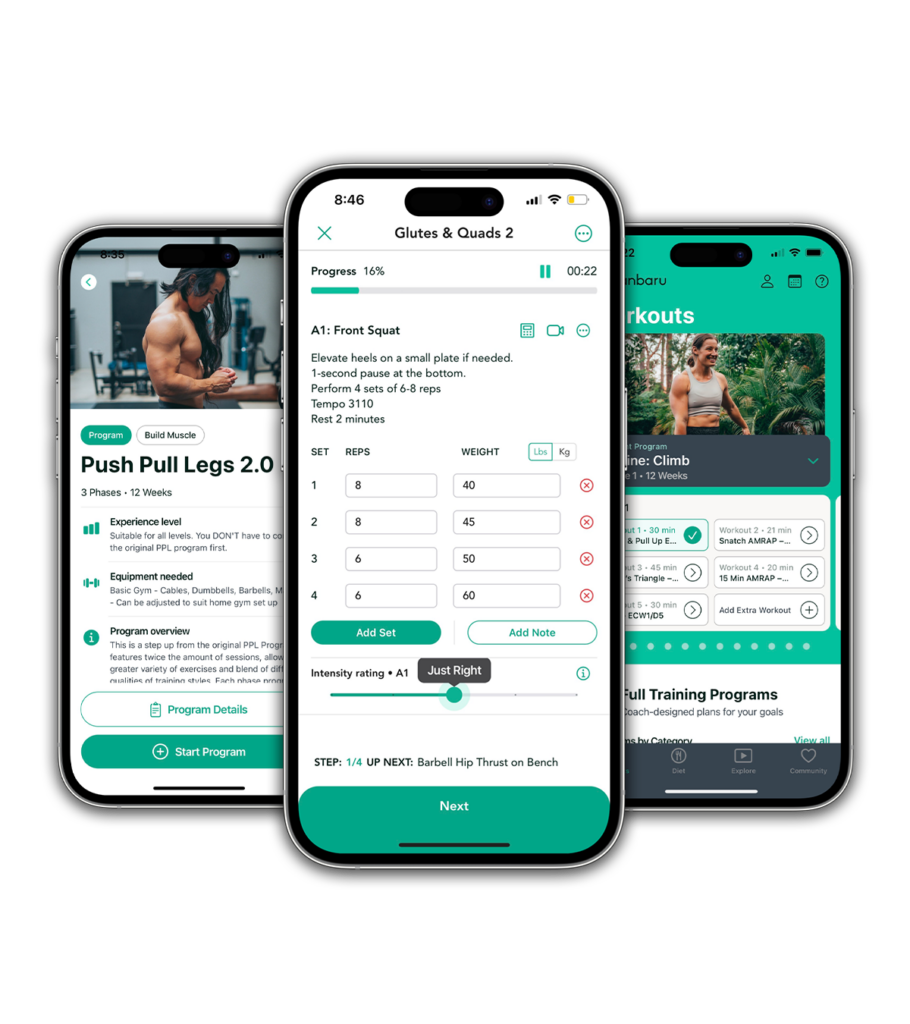
Follow proven programs written by expert coaches, delivered in an easy-to-use app built by lifters, for lifters.
Building muscle and getting stronger isn’t rocket science. You train hard, eat well, and rest sufficiently, and you’ll see changes. But there are ways to make it more efficient. In…
There is a simple equation to building muscle. Adequately intense weight training + eating enough for growth + getting sufficient sleep = muscle growth! But it’s normal to face roadblocks….
No, we promise it’s not click bait. We know the world of social media, particularly in the fitness industry, loves quick fixes — but that isn’t always possible. In this…
You need a few things for a good kick up to handstand.
A gentle push into the floor with the grounded leg
A gentle sweep of the leading leg
A shift of weight from the feet into the hands
The right around of push + sweep to result in the hips being placed over the hands as gently as possible
An intent from the hands to catch the force moving over the top to prevent an overbalance
Balance in the hands before closing the legs, or enough reps to know how much extra momentum the leg closure will add to the system
And there are a few things that hamper our ability to control a kick up.
Excessive force and momentum (i.e. throwing the hands down and pushing hard)
The hips starting very far away from where they will finish when stacked over the hips
Weak, intention-less hands with no effort to manage motion
Rushing to close the legs, adding momentum
We can work on these components by playing around with different variations and challenging different positions. The drills below give you different components of the pieces we want and constrain you away from some of the things we don’t want. Practice a few of these and see if they help your kick up!
Exercise Quick Navigation
Kick Up from Box to Wall
What is it?
The easiest kick up drill because it brings the hips over the hands before you have to push into the floor.
Technique
Place a small box (20″ or less) close to a wall so you can elevate your foot onto it with your hands placed near the wall ready to handstand. Sweep the leg up until it taps the wall behind you gently and you briefly float off the box with the grounded leg. Repeat. Only push very gently with the foot on the box, and focus on getting your hips over your hands rather than what’s going on with the feet.
Common Mistakes
Throwing the legs aggressively at the wall. Be gentle!
Wall Kiss Kick Ups
Technique
Like the above but without a box, push into the floor with the grounded leg and sweep the leading leg up just hard enough to gently tap the wall with the leading leg’s heel, then come back down. Repeat for reps. Focus on figuring out how hard you need to push to get your hips over your hands, not the feet.
Sprinter Kick Up to Wall
What is it?
The sprinter stance starts you with your hands and feet on the floor to reduce places you can add unnecessary momentum in your kick up.
Technique
With both hands and one foot on the ground, kick up gently into your handstand. You can close the legs, but don’t rush it! As always, just push hard enough to get the hips over the hands, rather than thinking about getting the feet up to the sky.
Sprinter Stance Kick Up
Exactly as above, but get off the wall and do it out in the open. Use your fingertips pressing into the floor as “brakes” so you don’t tip over the top.
Kick Up to Wall
What is it?
A place to kick up without the feeling of risk in the open, and a guaranteed stopping point.
How to use it better
Imagine the wall is not there. How would you change the amount of force you’re using to kick up? How would your hands behave as you got closer to getting the hips over the hands?
Anti-gravity kick ups
What is it?
A way to gently explore the amount of kick required to enter a handstand.
Technique
Starting in your sprinter stance, deliberately undershoot the kickup, and kick slightly harder each time you fall down until you spontaneously catch a float in the handstand or overbalance. If you overbalanced, try again with a little less force, and dig your fingertips into the floor to stop going over. If you float, see if you can recreate that amount of force.
Donkey kick to tuck handstand
What is it?
A good way to take the legs out of the kick up and focus on the hips-over-hands component.
Technique
Starting with your feet and hands on the floor, jump your feet off the floor into a tuck handstand. Don’t extend the legs up, just stay in the tuck and come back down. Start with small jumps and increase until you get a moment where your hips hover over your hands to learn how hard to push.
Kick up to hanstand in rack
What is it?
A way to kick into something that’s less forgiving than the wall.
Technique
Set 1-2 strong resistance bands in a rack at the height of your head. Kick up into it, trying not to let yourself fall into the band, but rather catch yourself in the hold. If you do fall into the band, see if you can gently shift your way out of it back into your hands. Try again until you hardly touch the band at all.
Kick up to handstand
Now combine all that you’ve learned above.
Get the hips over the hands as a priority
Be gentle as you push into the floor and sweep the leg
Grip the ground as you arrive in the handstand
Don’t rush the legs closed, spend time in the float if you catch one and remember how much force you used so you can recreate it next time!
Ready to workout?
Follow proven programs written by expert coaches, delivered in an easy-to-use app built by lifters, for lifters.
Building muscle and getting stronger isn’t rocket science. You train hard, eat well, and rest sufficiently, and you’ll see changes. But there are ways to make it more efficient. In…
There is a simple equation to building muscle. Adequately intense weight training + eating enough for growth + getting sufficient sleep = muscle growth! But it’s normal to face roadblocks….
No, we promise it’s not click bait. We know the world of social media, particularly in the fitness industry, loves quick fixes — but that isn’t always possible. In this…
I find it so weird that often when we learn to handstand, no one spends significant time talking about what to do with and feel in your hands. It leads most beginners to focus their efforts and intentions elsewhere, when the biggest cues are coming from the hands since they’re the base of support when you’re upside down.
Here’s what you need to know:
The pressure in your hands needs to shift forward from the heel and outside of the hand to the middle of the hand. That means there will be weight in your fingertips and possibly the base of your knuckles as well. It’s further forward than most people think when they start handstanding.
The muscles of the forearm should be working hard. You know how when you stand on one foot, the foot wobbles around and the muscles around your shin and calf have to adjust to create that balance? The hands have to do the same when you’re upside down
This article covers what you need to know about your hands in various handstand movements.
Exercise Quick Navigation
Handstand holds and walks
What should you feel?
A shift in pressure from the heel of the hand into the knuckles and fingertips as you kick up into the handstand
A maintenance of pressure in the middle of the hand as you hold
The fingertips digging into the floor whenever your body threatens to tip over the top and overbalance
The distal knuckles popping up off the floor if you are gripping the floor hard enough
The shoulders shifting forward whenever your body threatens to fall back down and underbalance
Common Mistakes
Leaving the weight too far back in the heels of the hands
Flat, lifeless hands with no intention of the fingertips into the floor
No action when encountered with a slight over or underbalance
Handstand Wall Pull Aways – Plate to Wrist
How to do this drill
Place 2x 20kg bumper plates right up against a wall.
Cartwheel or walk into a wall-facing handstand such that the base of your wrist is almost touching, and your wrist is touching, the plates.
Shift your body weight slowly off the wall, forward into the hands. At some stage, your wrists will gently peel off the bumper plates. At pretty much exactly this moment if you’ve set it up correctly, your feet will also leave the wall.
Grip the ground like your life depends on it to prevent an overbalance.
Enjoy the handstand you are now in.
Kick up to overbalance
What is it?
A bailing drill that can also double as a drill to teach you to really dig your hands into the floor when your weight shifts over the top.
Technique
Deliberately kick up with more force than is required for a handstand so that you start to overbalance. Delay the fall for as long as you can by digging your hands into the ground. When it can’t be rescued, twist to bail safely and catch yourself.
Play around with the intensity of the kick up and see if you can actually find the right amount of force to stop a kick up in its tracks.
Wrist Push Up
Why?
To build strength in your fingers and forearms to be better at handstands.
Technique
Kneeling on all fours, shift your body weight forward so that your shoulders are over your knuckles. Keeping the shoulders there, lift the thumb off the floor, then lift the heel of the hand off the ground by pressing the knuckles down into the floor. Don’t let yourself shift back while you do this – you should feel the undersides of your forearms contracting as you do so.
General Wrist Warm Up
What is it?
A wrist warm up to help get your wrists used to the amount of pressure that’s going to go through them once you start pressurising your hands correctly in a handstand.
What to do with it
Follow along with the video, and do this warmup or the pieces of it you think are relevant to you before you handstand.
Ready to workout?
Follow proven programs written by expert coaches, delivered in an easy-to-use app built by lifters, for lifters.
Building muscle and getting stronger isn’t rocket science. You train hard, eat well, and rest sufficiently, and you’ll see changes. But there are ways to make it more efficient. In…
There is a simple equation to building muscle. Adequately intense weight training + eating enough for growth + getting sufficient sleep = muscle growth! But it’s normal to face roadblocks….
No, we promise it’s not click bait. We know the world of social media, particularly in the fitness industry, loves quick fixes — but that isn’t always possible. In this…
Bands are a great teaching tool because they really force the issue with stability. Unlike a wall or a box where you can leave your weight in it and somewhat cheat your way through a float, flutter or shift drill, the band will make your life really unpleasant if you lean into it and move around. This is great – it means you have to work to be present in your hands and only use the band if you start to lose balance.
For all of these exercises, you’ll need to place 1-2 heavy resistance bands in a squat rack in the j-hooks, high enough in the rack to catch your feet when you kick or climb up.
Exercise Quick Navigation
Handstand Flutter from Rack
What is it?
The hardest of the flutter drills, because the band will prevent you from resting into it.
Technique
Kick up to the band in the rack the same way you would to the wall. The band will flex as you arrive in it. If you’re too close, it will spit you back out the way you came, so make sure you are 1-2 hand distances away from the rack. Split your legs apart and shift your body weight over your hands until the band stops wobbling. Slowly switch the legs, keeping almost all your weight in your hands (you will have to balance!) and being as light in the legs as possible.
Common Mistakes
Leaving weight in the band and wobbling, or collapsing and relaxing into the shoulders and spine.
Handstand Flutter from Rack – Facing the Rack
Technique
Exactly as the one before, but facing toward the band. Climb into it by placing one foot on the upright of the squat rack then hooking the other foot into the rack.
Band in High Rack to Handstand Hold
What is it?
This is a bounce drill, so you’ll have to control the momentum as the band throws you forward.
Technique
Find your way into a handstand facing toward the band. Allow a small bounce into and out of the rack to take you into a handstand hold. Grip the ground to prevent overbalancing and try to hold the handstand briefly.
Handstand Bounce to Walk
What is it?
A more aggressive drill where you use the bounce of the band to create a challenge to control.
Technique
Kick slightly off the band, then allow the bounce to force you into an overbalance as you rebound. Step into your handstand walk from there.
Ready to workout?
Follow proven programs written by expert coaches, delivered in an easy-to-use app built by lifters, for lifters.
Building muscle and getting stronger isn’t rocket science. You train hard, eat well, and rest sufficiently, and you’ll see changes. But there are ways to make it more efficient. In…
There is a simple equation to building muscle. Adequately intense weight training + eating enough for growth + getting sufficient sleep = muscle growth! But it’s normal to face roadblocks….
No, we promise it’s not click bait. We know the world of social media, particularly in the fitness industry, loves quick fixes — but that isn’t always possible. In this…
Are you “kind of” handstand walking but struggling to get the mechanics right? See if these drills help you click with the movement.
What we’re trying to promote with these is a strong push into the floor to open up the shoulder angle, get strong at taking one step on your hands at a time on your hands, and maintain enough of a strong line through the torso to propel your body forward.
Exercise Quick Navigation
Wall Walk
What You’ll Need
A wall.
Technique
Starting with your feet on the wall and your chest on the floor, push up into a high plank then shift your hips back to a pike. Step both feet up on the wall, then start walking your hands in toward the wall until your chest lightly taps the wall in a wall-facing handstand.
Make sure you pull your bottom ribs toward your belt line and stay in a long tight line so you’re not wobbling side to side much as you walk toward the wall.
Common Mistakes
Being loose in the core – this only costs you energy in the shoulders! Make your life easier by keeping a hollow body as best as you can.
Wax on Wax Off
What is it?
Practicing an efficient hand movement for your handstand walks.
What You’ll Need
A wall.
Technique
In a handstand on the wall (facing away from the wall), push even harder into the floor to make space to sweep the other hand around in a small circle (like you’re waxing a car, but elbows straight). This mimics how we want to step in a handstand walk.
Common Mistakes
Bending the elbows too much – in an efficient handstand walk, the elbows bend only slightly.
Lateral handstand walk
What is it?
Practicing the shift from one hand to the other and moving your body with it.
What You’ll Need
A wall.
Technique
In either a chest to wall or normal kick up to handstand position, take steps sideways by moving one hand then the other. Your weight will shift into the grounded hand. You can spice it up by walking over a plate as well if you want more challenge!
Kick Up Step to Wall
What is it?
Practice taking steps in open space then returning safely to the wall.
Technique
Kick up to a freestanding handstand then take a few steps toward the wall. The more confident you are, the further away you can start.
Handstand Step from Wall
What is it?
Taking your first steps in a handstand walk, without having to worry about the accuracy of your kick up.
What You’ll Need
A wall and space away from the wall to walk into.
Technique
Wall walk your way into a chest to wall handstand, shift your weight over the top of the fingertips and start stepping your hands to walk away from the wall.
Common Mistakes
Kicking off the wall instead of shifting into the overbalance, or shifting way too fast and not being able to control the overbalance to turn it into an efficient walk.
Handstand Walk Parallel to Wall
What is it?
Walking on your hands with the assistance of one foot dragging along the wall to prevent serious over- or under-balances.
What You’ll Need
A wall with 3-10m of space that you can walk along without running into any hazards.
Technique
Kick up to handstand then let the foot nearest the wall catch the wall.
Common Mistakes
Leaving the foot behind – you’ll need the foot on the wall to be slightly ahead of where your hands are for this to work well.
Ready to workout?
Follow proven programs written by expert coaches, delivered in an easy-to-use app built by lifters, for lifters.
Building muscle and getting stronger isn’t rocket science. You train hard, eat well, and rest sufficiently, and you’ll see changes. But there are ways to make it more efficient. In…
There is a simple equation to building muscle. Adequately intense weight training + eating enough for growth + getting sufficient sleep = muscle growth! But it’s normal to face roadblocks….
No, we promise it’s not click bait. We know the world of social media, particularly in the fitness industry, loves quick fixes — but that isn’t always possible. In this…
Most early handstand drills start on the wall – because we need help with the balance component at first. One of the mistakes beginners make with this is letting the wall take a lot of their weight. These drills will help you feel what it’s like to shift your weight into your hands instead of the wall.
Do them with the intention of putting as little weight into the wall as you can, using the wall gently for balance only.
Exercise Quick Navigation
Handstand Hold on Wall
Technique
Kick up to a handstand on the wall. Focus on the following:
Pushing into the floor to get as tall as you can, and open the shoulder as much as you can
Gently squeeze the glutes and pull the ribs down toward your belt line to avoid letting the lower back extend. Only your heels should be on the wall
Grip the ground by pushing your fingertips into the floor
Shift your body weight over your hands instead of letting it rest into the wall. Touch the wall as lightly as you possibly can.
Common Mistakes
Letting the low back sag and form the “banana back” position.
Letting the butt or legs touch the wall
Letting the hands be lazy into the floor instead of gripping the ground to pull weight off the wall
Relaxing into the shoulders and sinking down toward the floor
Squeezing the abs too hard – this will take away from your ability to push into a strong shoulder position, unless you have very impressive shoulder mobility
Handstand Hold on Wall – chest to wall (wall facing)
Technique
The wall facing handstand on wall is harder to get into but is easier to keep a strong body line in. Use this opportunity to focus on keeping the ribs and belt line as close together as they can be without losing range in the shoulder. You do not need to squeeze your abs hard.
Make sure you stay as light on the wall as possible – the wall should not be doing the work!
Common Mistakes
Relaxing into the shoulders and sinking down toward the floor
Squeezing the abs too hard
Letting the legs or stomach rest on the wall
Letting the wall take your body weight
Handstand Hold Parallel to Wall
What is it?
A way to bridge the gap between free standing holds and holds on the wall. You can use one foot gently on the wall to correct slight over- and under-balances.
Technique
Kick up to a freestanding handstand next to a wall, with one shoulder near the wall. Let one foot reach out and catch the wall with your foot. Allow that foot to correct small tips in the wrong direction with your balance – it won’t be enough for major deviations from the balance point but it will help if you wobble a little!
Wall Pull Aways (heel pulls)
What is it?
A movement where you pull yourself from a handstand on the wall and briefly leave the wall to hold off the wall. You can either do these for reps falling back to the wall, or do more aggressive pulls to build strength in the fingers that help to prevent overbalancing.
Technique
Kick up to handstand on the wall, placing your fingertips on the ground just over one hand-distance from the wall. Dig your fingertips into the ground hard enough to shift your bodyweight over your hands and allow the heels to gently pull off the wall at the same time. If you can, allow yourself to spend a second or two in that handstand as your heels peel off the wall before returning to the wall. Over time, build the duration up so that you can peel off the wall and hold for several seconds.
Chest to Wall Pull Aways (Toe Pulls)
What is it?
A movement where you drift your bodyweight over your hands from the wall until you are no longer touching the wall. You can use this to practice finding your balance on your hands in a handstand.
Technique
Wall walk, split or cartwheel your way into a wall-facing handstand, with the heel of your hand a little more than one hand-distance from the wall. Shift your shoulders and hips over your hands away from the wall, feeling your toes get light and the amount of pressure on the wall slowly reduce to zero. If you can, allow yourself to spend a second or two in that handstand before returning to the wall. Over time, build the duration up so that you can peel off the wall and hold for several seconds.
Handstand flutter
What is it?
A movement that allows you to experience brief moments in the handstand while switching the legs to allow for some support from the wall.
Technique
Kick up to a handstand on the wall, a little further away than usual but not far. Separate your legs until you feel the leading leg pull your body weight away from the wall into your hands. Slowly and gently switch which leg is on the wall, letting the legs cross over the middle so there is a brief moment where you are in a handstand.
Common mistakes
Letting the feet slam into the wall – this should be a gentle switch of the feet
Letting both feet be on the wall – we are trying to reduce your reliance on the wall with this drill
Passive hands – you need to grip the ground to make this work
Letting the low back sag – reach tall like you want your toes to touch the sky
Handstand flutter (chest to wall/wall facing)
What is it?
The same as the above, but facing the wall.
Technique
Wall walk, split or cartwheel your way into a wall-facing handstand, slightly further away from the wall than usual. Shift your shoulders and hips over your hands away from the wall by separating your legs. Slowly and gently switch which leg is on the wall, letting the legs cross over the middle so there is a brief moment where you are in a handstand.
Common mistakes
Letting the feet slam into the wall – this should be a gentle switch of the feet
Letting both feet be on the wall – we are trying to reduce your reliance on the wall with this drill
Passive hands – you need to grip the ground to make this work
Letting the low back sag – reach tall like you want your toes to touch the sky
Ready to workout?
Follow proven programs written by expert coaches, delivered in an easy-to-use app built by lifters, for lifters.
Building muscle and getting stronger isn’t rocket science. You train hard, eat well, and rest sufficiently, and you’ll see changes. But there are ways to make it more efficient. In…
There is a simple equation to building muscle. Adequately intense weight training + eating enough for growth + getting sufficient sleep = muscle growth! But it’s normal to face roadblocks….
No, we promise it’s not click bait. We know the world of social media, particularly in the fitness industry, loves quick fixes — but that isn’t always possible. In this…
If you’re starting to feel proficient with handstand holds and want to turn that skill into walking, here are some drills you can try to help you understand the lateral shift required to get from one hand to the other, and build strength on your hands so you can successfully learn to walk.
Exercise Quick Navigation
Pike on Box Shift
What You’ll Need
A 20″ x 24″ x 30″ box.
Technique
In a nicely stacked pike with your feet on the box (hips over hands), shift sideways so your weight is in one hand. Then, shift the other way. At this stage, you don’t need to pick the hand up off the floor, but that will be where this drill heads next as you progress it.
Common Mistakes
Not getting the hips over the hands! Make sure your hips are directly over the middle of your hands – you can take a photo or video of yourself if it helps. It has to be the middle of the hands or the knuckles, not the heel of the hand.
Single Arm Pike on Box
What is it?
Exactly the same as the shift, but you’re holding the single arm position on one side for time. Hang on for as long as you can to build strength here!
What You’ll Need
A 20″ x 24″ x 30″ box.
Single Arm HS Shifts
What is it?
In a handstand position, shifting your body weight from one hand to the other.
What You’ll Need
A wall.
Technique
Kick up to a handstand against the wall, as tall as you can with your eyes on the wall opposite you, and shift your body weight into one hand. If you’re feeling adventurous, you can lift the hand off the floor completely and tap the hip, or just lift it slightly off the floor.
Common Mistakes
Bending the elbows or relaxing into the handstand – make sure you are pushing HARD into the floor!
Single Arm HS Shifts (wall facing/chest to wall)
Ready to workout?
Follow proven programs written by expert coaches, delivered in an easy-to-use app built by lifters, for lifters.
Building muscle and getting stronger isn’t rocket science. You train hard, eat well, and rest sufficiently, and you’ll see changes. But there are ways to make it more efficient. In…
There is a simple equation to building muscle. Adequately intense weight training + eating enough for growth + getting sufficient sleep = muscle growth! But it’s normal to face roadblocks….
No, we promise it’s not click bait. We know the world of social media, particularly in the fitness industry, loves quick fixes — but that isn’t always possible. In this…
Learning to walk on your hands requires a decent amount of shoulder strength, good handstand foundations, and the ability to shift your body weight from one side to another while maintaining the position of your core and body. These drills focus on learning to shift your body weight without losing shape.
Exercise Quick Navigation
Single Arm Lifts in Plank
What is it?
The friendliest and easiest first exposure to bringing some of your body weight into one hand. This is a good place to start since it’s less heavy than a pike position and is usually more familiar than a pike.
Technique
From a high plank, shift your body slightly to the side so you can lift one hand off the floor.
Common Mistakes
Letting your lower bag sag, or upper back drop down between the shoulder blades. Push tall into the floor with locked elbows!
Plank up downs
What You’ll Need
A box and a bumper plate
Technique
Starting in a high plank with your feet on the box and your hands either side of a bumper plate, step one hand up onto the plate, then the other. Then, step the first hand back down off the plate, and the second. Repeat for as many reps as is prescribed. Push into the floor to make space and let your shoulder blades glide forward instead of being pinned back
Common Mistakes
Make sure you stay tight in abs so your body is a straight line from shoulders to toes – don’t let your lower back sag! Also avoid the upper back sagging down into the shoulder blades – they shouldn’t be sticking up or squeezed back. Keep your elbows nearly locked the whole time and use this push from the sholuder blades to move the hands.
Plank walk over plate
What is it?
This is an entry-level drill to help you understand how to push into the ground to make space for the other hand to sweep through like you would in a handstand walk.
What You’ll Need
A bumper plate and a low box.
Technique
Setting up with your feet on the box and hands on one side of the bumper plate, walk both hands over the bumper plate. Repeat in the other direction and accumulate time on your hands like this.
Common Mistakes
Sagging through the low back, bending the elbows, or sinking into the shoulder blades.
Single arm alternating pike shift
What is it?
This shifting movement is a nice bridge from shifting hands in a plank movement to doing it in a more handstand-like pike movement.
Technique
Make a pike position on the floor. Shift your body weight enough to clear one hand from the floor, and tap your hip. Then switch sides.
Common Mistakes
Theres’ no need to extend the back heaps here – you can just stay long with the spine.
Lateral pike walk over plate
What is it?
Very much like the plank walk over the plate, but shifting into a more handstand-like position.
What You’ll Need
A 20″ x 24″ x 30″ and a bumper plate.
Technique
Walking into a pike (knees can be bent) with your hands on one side of the bumper plate, walk your hands over the plate until you’re on the other side. Count this as one rep, then walk back the other way.
Common Mistakes
Not getting hips stacked over hands – make sure your hips are directly over the middle of the hands when you do this.
Ready to workout?
Follow proven programs written by expert coaches, delivered in an easy-to-use app built by lifters, for lifters.
Building muscle and getting stronger isn’t rocket science. You train hard, eat well, and rest sufficiently, and you’ll see changes. But there are ways to make it more efficient. In…
There is a simple equation to building muscle. Adequately intense weight training + eating enough for growth + getting sufficient sleep = muscle growth! But it’s normal to face roadblocks….
No, we promise it’s not click bait. We know the world of social media, particularly in the fitness industry, loves quick fixes — but that isn’t always possible. In this…
Getting strong enough to spend minutes in a handstand requires spending a lot of time on your hands! But not all of that will happen upside down right away. We can regress straight arm strength training and make it more fun by mixing up positions and adding in other sources of challenge.
Exercise Quick Navigation
Plank to Down Dog
What is it?
The friendliest, easiest movement to start moving your shoulders from a plank into a more handstand-type postion.
Technique
Shift from a high plank position into a pike or downward dog position. Think about pressing into the floor and keeping your neck long.
Common Mistakes
There’s no need to extend your back excessively here – that’s not a position we will need in a handstand. Keep your ribs pulled down toward your pelvis like you’re doing a very small crunch and let the shoulders do the work.
Box Plank Around The World
What is it?
An easy way to accumulate lots of time with your weight through your hands and shoulders.
What You’ll Need
A 20″ x 24″ x 30″ box.
Technique
Set yourself up in a strong plank (no saggy spines!) on a box. Keep your feet in one place, and walk your hands around the box for as many reps as is prescribed.
Box Plank to Pike
What is it?
An early way to expose you to moving from a horizontal position to a stacked, hips over hands position, while still working on straight arm strength. Try to go as close to the box as you can – you want to walk your hands so close to the box you almost feel like you’re going to fall over the top.
What You’ll Need
A 20″ x 24″ x 30″ box.
Technique
With your feet on a box, walk from a high plank to a pike position (hips stacked over hands). Don’t worry if you have to bend your knees, hips over hands is more important than straight legs.
Common Mistakes
Not walking all the way in. Film yourself from the side if you need to check that you are walking close enough. You should be able to draw a vertical line from your hip to the floor and that line should draw through the middle of your hands (not the heel of your hands).
Lateral Plank Walk Over Plate to Box Wall Walk in Pike
What is it?
In a high plank, walking the hands back and forth over a bumper plate then walking into a pike position.
What You’ll Need
A 20″ x 24″ x 30″ box and a 10-20kg bumper plate.
Technique
Make sure to keep a tight body line and walk all the way into your pike position so your hips are over your hands.
Pike Around The World
What is it?
In a pike position, walking your hands around a box to accumulate time upside down on your hands. It’s not a flexibility contest, so don’t worry if you need a higher box or if you need to bend your knees.
What You’ll Need
A 20″ x 24″ x 30″ box.
Technique
Walk from a plank with your feet on a box to a pike. Then walk your hands around the box in a circle, keeping your hips stacked over your hands.
Handstand Up Downs
What is it?
A shoulder strength drill that forces you to push into the ground so you can step up onto a plate.
What You’ll Need
A wall and a 10-20kg bumper plate.
Technique
Place a bumper plate near a wall and kick up to handstand with your hands on either side of the plate. Step one hand up onto the plate, then the other. This will be a narrow shoulder position for some, do your best. Then step back down. That’s one rep! Keep going, it will get burny pretty quickly.
Common Mistakes
Letting the back sag instead of staying tall and upright in the handstand.
Handstand Up Downs C2W
What is it?
The same as the above, just facing the wall.
Technique
Place a bumper plate near a wall and wall walk or cartwheel into a wall-facing handstand with your hands on either side of the plate. Step your hands up and down onto the plate.
Common Mistakes
Putting too much weight into the wall – stay in your hands!
Ready to workout?
Follow proven programs written by expert coaches, delivered in an easy-to-use app built by lifters, for lifters.
Building muscle and getting stronger isn’t rocket science. You train hard, eat well, and rest sufficiently, and you’ll see changes. But there are ways to make it more efficient. In…
There is a simple equation to building muscle. Adequately intense weight training + eating enough for growth + getting sufficient sleep = muscle growth! But it’s normal to face roadblocks….
No, we promise it’s not click bait. We know the world of social media, particularly in the fitness industry, loves quick fixes — but that isn’t always possible. In this…
Fear is a normal part of learning to handstand (or any gymnastics) and we don’t have to just ignore it! Using drills to stretch your comfort zone helps you learn to become comfortable with new movements and stay safe doing so.
Learning to bail from a handstand is particularly important, and it all starts with remembering a movement you probably did at school: the cartwheel! The cartwheel helps us understand how to fall from a handstand because you shift onto one hand and rotate around that planted hand. This is the same movement we do when we overbalance from a handstand.
We can learn cartwheels to intentionally mimic overbalanced positions and learn to manage them, while still progressing them slowly enough that you feel safe.
Exercise Quick Navigation
Cartwheel
Technique
The important part of a cartwheel is the sequencing – one limb at a time lands on the floor. We don’t want both feet landing on the floor at once. It’s okay if your cartwheel is small at first, but as you gain confidence try to make it bigger and bigger until your feet pass directly over your head and you are perfectly vertical upside down.
Common Mistakes
Beginners will be tempted to go around the side of a cartwheel instead of over the top. The more you can get yourself to go fully upside down, the more helpful it will be when you bail from a handstand.
Cartwheel off box
What is it?
When you’re competent with a cartwheel, or if you need to try a different version, you can start the cartwheel with your feet on a box. This will help force your weight further over the top, so make sure you’re not just hopping off to the side of the box.
What You’ll Need
A 20″ x 24″ x 30″ box.
Technique
Walk your hands in so your hips are over your hands in a pike, then shift your weight over your hands so far that you have to lift one hand with the other still planted, then twist to catch yourself with one foot at a time.
Common Mistakes
Landing both feet at once, or falling sideways next to the box instead of rotating over one planted hand.
Cartwheel off wall
What is it?
Much like the box, the wall leaves you with almost no escape from the shift required to go over the top. Get adventurous and force yourself to shift close to the wall so you can really feel what it’s like to overbalance over the top of your hands.
What You’ll Need
A wall!
Technique
Wall walk your way to a wall-facing handstand, then shift your weight forward in your hands until you start to fall over the top. Shift one hand out of the way, rotate in that direction, and catch one foot on the floor at once.
Common Mistakes
Not shifting far enough over the top of the hands.
Overbalance from wall
What is it?
This is much like the cartwheel from wall, but you’re going to generate some momentum pushing off the wall so that you have to catch in your cartwheel quickly.
What You’ll Need
A wall.
Technique
Wall walk your way to a wall-facing handstand, then use your foot to push off the wall into an overbalance. Shift one hand out of the way, rotate in that direction, and catch one foot on the floor at once.
Single arm cartwheel
What is it?
A more advanced cartwheel that can help you understand how to rotate over one hand a bit faster than the two-handed cartwheel.
Technique
Enter the cartwheel as usual, but do not place the second hand on the ground. Twist over the top, landing your feet in the same order as usual.
Common Mistakes
The one handed cartwheel is very hard unless you can do a good cartwheel with a full rotation over the top. Make sure your cartwheel is good before you try this!
Ready to workout?
Follow proven programs written by expert coaches, delivered in an easy-to-use app built by lifters, for lifters.
Building muscle and getting stronger isn’t rocket science. You train hard, eat well, and rest sufficiently, and you’ll see changes. But there are ways to make it more efficient. In…
There is a simple equation to building muscle. Adequately intense weight training + eating enough for growth + getting sufficient sleep = muscle growth! But it’s normal to face roadblocks….
No, we promise it’s not click bait. We know the world of social media, particularly in the fitness industry, loves quick fixes — but that isn’t always possible. In this…